Why Repair Estimates Confuse Most Drivers
A repair estimate isn't designed to be read by consumers - it's a shop's internal pricing document adapted for customer use. The result is a format that mixes industry shorthand with itemized costs in ways that aren't immediately obvious. Most drivers either approve everything without reading it or feel too intimidated to ask questions. Neither approach serves your interests.
Understanding the structure of an estimate doesn't require mechanical expertise. It requires knowing what each section represents and what questions give you useful information. Skipping this step regularly is one of the patterns covered in our look at maintenance tasks drivers skip - small knowledge gaps compound into larger costs over time.
Use Labor Time Guides as a Benchmark
Shops typically price labor using standardized time guides (such as Mitchell or AllData) that estimate how long a repair should take on a given vehicle. These figures are generally available to consumers online. Comparing the billed labor hours against published estimates can reveal whether the quoted time is in the expected range for your specific make and model.
The steps below walk through an estimate the way a knowledgeable consumer would - methodically, without assuming bad faith, but without leaving anything unexamined either.
What you will need
What to Do Before and After You Review the Estimate
Before you drop off your vehicle, confirm the shop will provide a written estimate before starting any work. This isn't just good practice - in many states it's legally required above a set cost threshold. A verbal quote has little standing if a dispute arises later. You can find your state's specific rules through your state attorney general's consumer protection office.
Always Get the Estimate in Writing
Most states require shops to provide a written estimate before starting work above a certain dollar threshold. A written estimate gives you legal standing if the final bill differs significantly. Never authorize work based solely on a verbal quote. Ask for the estimate to be signed and dated.
Once you've reviewed the estimate using the steps below, you have three reasonable responses: approve as written, ask questions and negotiate specific line items, or decline and seek a second opinion. All three are legitimate. Getting a second estimate for a major repair - anything over a few hundred dollars - is a reasonable and common consumer practice.
For context on how repair and maintenance costs fit into the full picture of what a vehicle actually costs to own, see the auto ownership costs hub. And if you're weighing whether a repair is worth doing yourself, DIY vs. shop guidance can help you assess which work genuinely requires a professional.
Separate the estimate into its three main sections
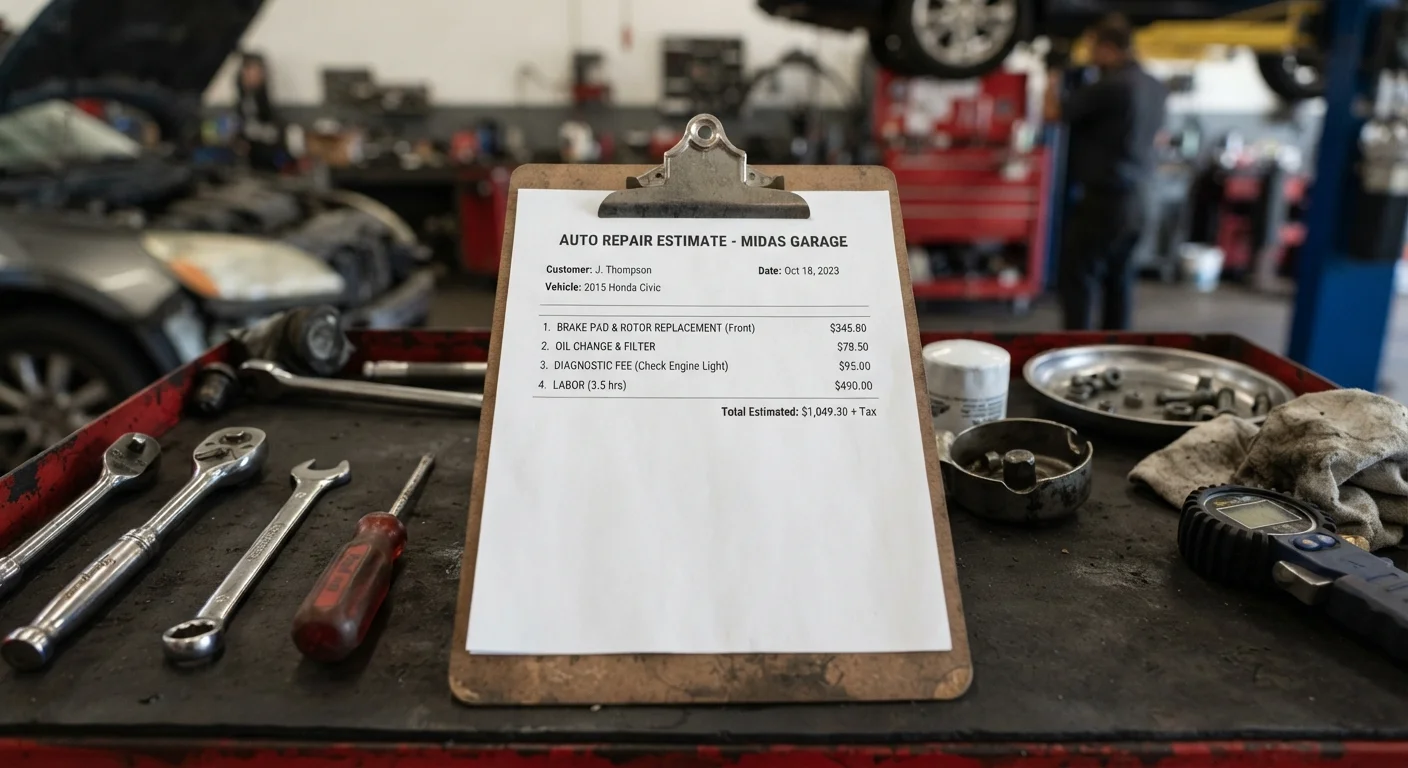
Nearly every repair estimate is structured around three cost buckets: labor, parts, and fees (sometimes called shop supplies or miscellaneous charges). Before analyzing any individual number, physically identify where each category appears on your estimate. Some shops combine them into a single line per repair; others break them out separately. Either format is acceptable - your goal is to know what you're paying for in each category.
Understand how labor costs are calculated
Labor is billed as an hourly rate multiplied by the number of hours the job is estimated to take. The hourly rate varies significantly: independent shops often charge less than dealerships, and regional costs differ as well. The hours billed typically come from a published labor time guide rather than a stopwatch - meaning a job that physically takes 45 minutes may still bill at one hour if that's what the guide specifies. This is standard industry practice, not necessarily overcharging.
Check that the number of hours listed matches what labor guides suggest for your specific repair and vehicle. See auto ownership costs for context on how labor expenses factor into the broader picture of running a vehicle.
Examine the parts listed and their type
Parts on an estimate will typically fall into one of three categories: OEM (Original Equipment Manufacturer - made to the automaker's spec), aftermarket (made by a third party), or remanufactured (rebuilt from a used core). The estimate should specify which type is being used. OEM parts generally cost more; quality aftermarket parts can be a reasonable alternative for many repairs, but not all. Ask if you have a preference, and ask the shop to note the parts type on the written estimate.
Shops mark up parts - this is a standard and expected part of their business model. What matters is that the parts are appropriate for your vehicle and the markup is reasonable relative to publicly available retail pricing.
Question any line items you don't recognize
Scan every line on the estimate and flag anything that isn't self-explanatory. Common additions include diagnostic fees (charged for the technician's time to identify the problem), shop supply fees (consumables used during the repair), and environmental disposal fees (for fluids or hazardous materials). Most of these are legitimate - but you should understand what each one covers. Ask the service writer to explain any charge you can't clearly tie to a specific service or material.
[warning_callout]Ask about the authorization threshold for additional work
Shops sometimes discover additional problems once they open up a vehicle. Before authorizing the original work, ask: If you find something else while you're in there, at what dollar amount will you call me before proceeding? This sets a clear boundary and prevents bill shock. A reputable shop will commit to a figure - often $50 to $100 above the estimate - and will contact you before exceeding it.
Understanding how to evaluate shop behavior before a repair is as valuable as knowing what to look for after - similar principles apply when reviewing pre-purchase inspection findings on a used vehicle.