Why Camera Settings Exist (and Why Auto Isn't Always Enough)
Modern smartphones are genuinely impressive at automatic photography. The camera app reads the scene, adjusts exposure, selects focus points, and even processes multiple frames together - all before you lift your finger from the shutter button. For most snapshots, that's exactly what you need.
But auto mode makes assumptions. It assumes you want the brightest possible result. It assumes the subject in the center is the one you care about. It assumes a standard color balance. When those assumptions are wrong - shooting a backlit subject, capturing a specific mood, or photographing something the AI hasn't been trained to recognize well - the result is a photo that looks fine but not like what you actually saw.
Understanding what the individual settings do doesn't require becoming a professional photographer. It just requires knowing which knob to turn when auto gets it wrong. This guide covers every major camera setting you're likely to encounter, in plain language, with practical guidance on when each one is worth touching. For a broader look at what your phone's hardware specs actually mean, see our phone specs glossary.
Exposure Controls: Brightness, ISO, and Shutter Speed
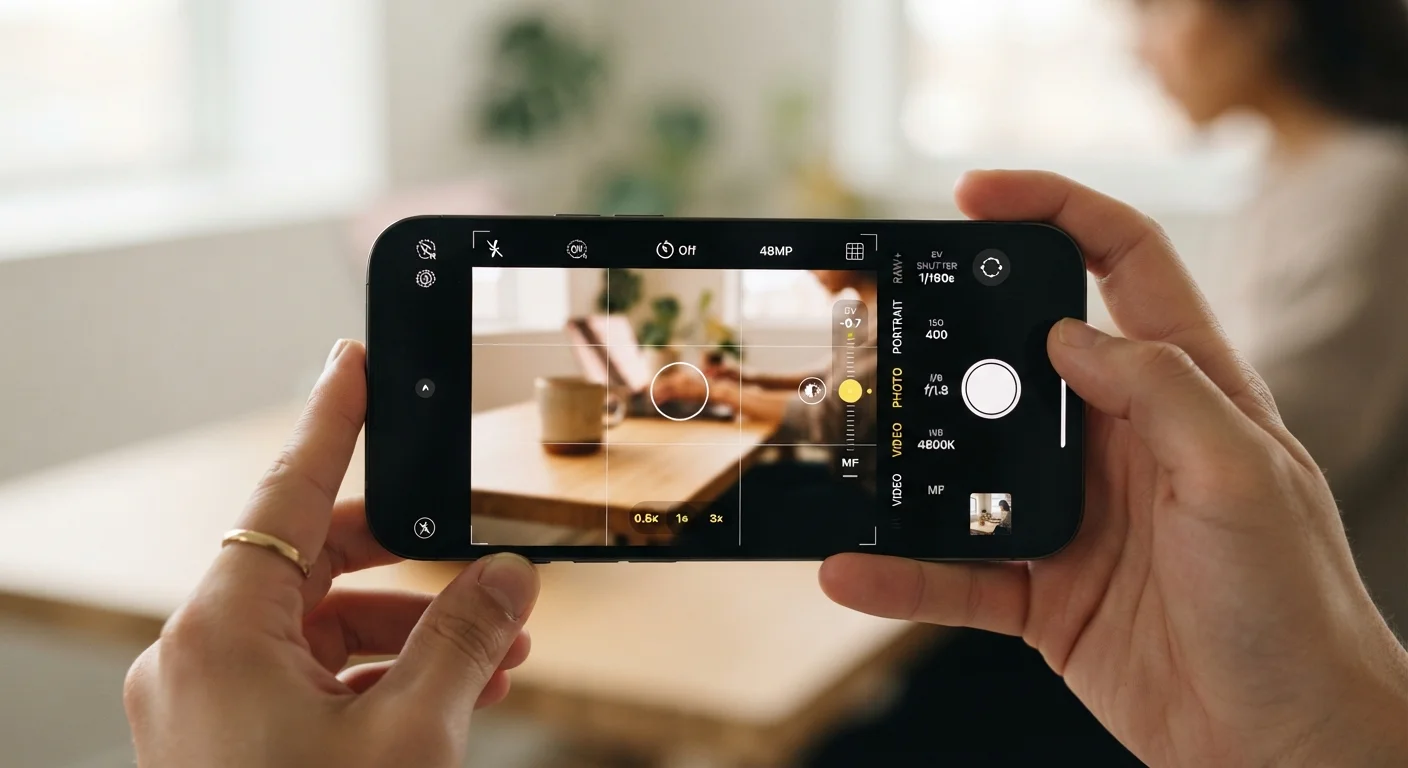
Exposure compensation is the slider - usually shown as a sun icon with a + and - scale - that lets you tell the camera to shoot brighter or darker than it would on its own. Tap the screen to set focus, then drag that slider. It's the single most useful manual override for everyday shooting.
ISO measures how sensitive the camera sensor is to light. A low ISO (100-400) produces clean, sharp images in good light. A high ISO (1600 and above) lets you shoot in dim conditions but introduces visible grain, called noise. Most cameras increase ISO automatically in low light; if your photos look grainy, your camera is compensating for darkness.
Shutter speed controls how long the sensor is exposed to light. A fast shutter (1/1000s) freezes motion - useful for sports or kids running around. A slow shutter (1/30s or longer) lets in more light but will blur anything that moves, including your own hands. This is why night photos on a tripod look sharper than handheld ones.
When shooting in bright, high-contrast scenes, dial exposure compensation down slightly - most cameras overexpose to protect shadow detail, but highlights that are blown out cannot be recovered.
Overexposed highlights are permanent data loss in a JPEG; slightly underexposing protects them and you can lift shadows in editing with far less quality loss.
Use tap-to-focus deliberately whenever your subject is off-center - don't let the camera guess which part of the frame is the priority.
Phone cameras default to detecting faces or the nearest large object; in complex scenes, they frequently pick the wrong target, and a single tap costs nothing to correct.
These three controls - exposure compensation, ISO, and shutter speed - form what photographers call the exposure triangle. Changing one affects the others. Your camera's auto mode is constantly balancing all three; understanding that balance helps you predict when it'll make a tradeoff you disagree with.
HDR, Night Mode, and Computational Photography
HDR stands for High Dynamic Range. When you photograph a scene with both very bright and very dark areas - a window-lit room, a sunset behind a person - a single exposure can't capture both correctly. HDR solves this by taking multiple frames at different exposures and blending them. The result retains detail in bright highlights and dark shadows simultaneously.
Most phones set HDR to automatic, which is usually appropriate. Where it can go wrong: fast-moving subjects get ghosting artifacts because the multiple frames don't align perfectly. If someone is moving, HDR off (or a dedicated fast-capture mode) will produce a cleaner result.
Night Mode works similarly, stacking multiple long-exposure frames and aligning them computationally to reduce noise while keeping brightness. The tradeoff is time - Night Mode takes anywhere from one to several seconds per shot, during which both the phone and the subject need to stay still.
When Computational Features Work Against You
AI-driven features like portrait mode, skin smoothing, and scene enhancement can over-process images - particularly in close-up portraits or in low light. If your photos look unrealistically smooth or colors appear exaggerated, check whether a processing feature is active and consider turning it off. These settings are often buried in the 'More' or 'Pro' section of your camera app.
Computational photography is the umbrella term for all the AI-assisted processing your phone does invisibly: scene detection, portrait background blurring (bokeh), skin tone smoothing, and color enhancement. These features generally improve results, but they're also where phones occasionally over-process - producing unnaturally smooth skin, sharpened textures that look digital, or colors that don't match what you saw. Knowing these systems exist helps you recognize when they're the problem.
Aspect Ratio and Resolution: What You're Actually Choosing
Aspect ratio is the shape of your photo - the width-to-height proportion. The most common options are:
- 4:3 - The default on most phones. Matches the sensor's native shape and captures the most image data.
- 16:9 - Widescreen, matching most TV and desktop displays. Crops the top and bottom of the frame.
- 1:1 - Square, popularized by social media. Crops significantly from both sides.
- Full / 3:2 - Some phones offer this as a sensor-native option with no cropping.
Shooting in 4:3 and cropping later gives you the most flexibility. Shooting in 16:9 or 1:1 in-camera means that data is gone permanently - you can't uncrop a photo after the fact.
Resolution determines how many pixels make up the image. Higher resolution means larger file sizes and more detail when printing or zooming in. Many phones default to a lower resolution even if the sensor supports more, because the phone combines neighboring pixels (called pixel binning) to improve low-light performance. Check your settings menu to see whether a higher-resolution mode is available and what tradeoffs it involves. Keep in mind that more photos at higher resolution will fill your storage faster - our guide to smartphone storage explains how to think about that.
RAW vs. JPEG: When Format Actually Matters
Every phone shoots in JPEG by default. JPEG is a compressed format - the phone processes the raw sensor data, applies sharpening, color correction, and noise reduction, then throws away the underlying data to save space. The result is a ready-to-share file that looks good without any editing.
RAW format (sometimes called DNG on Android phones) saves the unprocessed sensor data. Nothing is applied, nothing is discarded. The files are substantially larger - often 4-10× the size of a JPEG - and they look flat or dull until you edit them in software like Adobe Lightroom or similar apps.
When RAW Is Actually Worth It
RAW format pays off when you edit photos before sharing them and need to recover detail from shadows or blown highlights. If you shoot and share directly, JPEG will look just as good - or better - because the phone's processing is already optimized for that workflow. Consider RAW + JPEG mode as a middle ground if your phone supports it.
RAW is worth using if you plan to edit your photos and want maximum control over the final result - especially for exposure recovery, color grading, or removing noise from dark shots. It is not worth using if you share photos directly from your phone without editing, because the files are large, slow to process, and won't look better out of the box than a well-processed JPEG.
Some phones offer a RAW + JPEG mode that saves both simultaneously, giving you the flexibility to edit when you want it and a ready-to-share file when you don't.
Focus, White Balance, and Other Controls Worth Knowing
Focus: Tapping anywhere on the screen moves the focus point to that area - this is the single most underused camera gesture. When your phone focuses on the wrong subject, tap the right one. Many phones let you lock focus by pressing and holding, preventing the camera from refocusing if the scene shifts.
White balance controls how the camera interprets color temperature. Auto white balance works well under consistent light but can shift noticeably between frames in mixed lighting (indoor lights plus a window, for example). Manual presets - Daylight, Cloudy, Tungsten, Fluorescent - lock the color interpretation and keep it consistent across a sequence of shots.
Grid lines overlay a rule-of-thirds grid on your viewfinder. This is a compositional aid, not a technical setting, but it's one of the most practically useful things you can turn on. Placing your subject along one of the grid lines rather than dead-center produces more visually balanced photos in most situations.
Timer and burst mode are straightforward but worth knowing: the timer delays the shutter so you can get into the frame or eliminate camera shake; burst mode takes a rapid sequence of frames, useful for capturing fast-moving subjects and choosing the best one afterward.
If you're newer to smartphone features in general, our beginner's guide to smartphones covers the broader landscape of settings worth understanding when you first get a device.
4:3
Default aspect ratio on most smartphone cameras
This ratio matches the native sensor shape on the majority of current smartphones, preserving the most image data per shot.
4-10×
Approximate size increase of RAW vs. JPEG files
RAW files retain unprocessed sensor data, which dramatically increases file size compared to a phone's compressed, processed JPEG output.